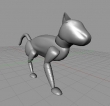
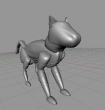
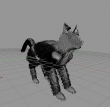
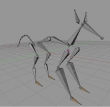
 I have recently been enjoying working on modelling and rigging a cat in Blender. The challenges are manifold: from realistic fur to simulating quadruped movement to combining complex actions into a believable animal. The process has been very satisfying so far, as I am making good use of Blender’s non-linear action editor and learning a lot about character animation in the process. Here is an early, rough sample of a transition between walking (left two; right two) to trotting (front left, back right; back left, front right):
I started by modelling a cat in Plasticine (click to enlarge):
So I could get a “feel” for the different geometric shapes that compose the cat. I used cylinders for the different parts of the legs, a cone for the head, a large cylinder for the body, and semi-spheres for feet. This helped me understand how the cat is put together, so that I could compose my own cat out of geometric primitives in Blender.
I started by assembling half a cat using the same primitives I used in clay (click to enlarge):
And then mirrored these components across to create a full cat (click to enlarge):
I then duplicated these same primitives into some new layers, and started playing with static particle effects to create a layer of fur. Here are the settings I used for the body:
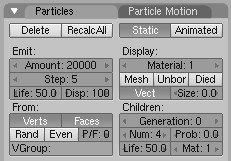
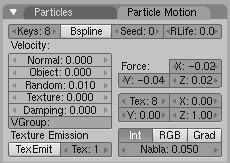
And the preview of all the different primitives, each with their own fur settings for direction, length, etc. to attempt to simulate how the different regions of a cat’s fur behave:
Next I created an armature. I studied feline skeletal anatomy to figure out the rough proportions and which hinges bend (and how). I also used this guide in naming the bones of my armature (tibia/fibula, femur, metatarsals, etc.). By parenting the bones correctly to each other and using the IK Solver for the feet, I was able to create an armature that can be posed in ways that are analogous to how a cat really moves. (click image below to enlarge)
I assembled this armature inside the primitives, then parented the various primitives to their corresponding bones. I did this for both the skin primitives layer and the fur primitives layer (since, after all, they need to move together). This approach seems much easier to me than trying to creat a single, uniform mesh and then select all the correct vertices to parent to the corresponding bones.
Having assigned everything correctly and played with various poses to ensure the armature was behaving in a reasonable way, the next step was to turn the disparate mesh primitives into a single, unified skin. This way, rather than looking like a cat composed of geometric shapes, or a cat wearing plate mail armor, the vertices interact and pull on eachother just like a real unified convering of skin. Mostly this was a process of trial and error, using the knife tool to cut away and remove overlapping regions, then “stitch” the vertices of two meshes together using the vertex merge operation. This meant lining up the right number of vertices between objects, positioning them in relation to eacht other, and then finally joining the two meshes into one so they could be stitched. This was probably the longest part of the process, and as you can see from the movie above I still have some work to do on the front shoulders to get them to behave more like a real cat’s shoulders. This will be especially important for the “stalking” action, where the cat’s soulders often protrude while walking due to their trying to keep their torso low to the ground.
Finally, I created walk cycle actions in the action editor. I created a “walk” (left two; right two) and a trot (front left, back right; back left, front right) action, taking care to use a uniform distance between each step (2 BU). Then I wanted to simulate–as I have seen cats often do in real life–a transition between the two. I pasted the last pose of the walk cycle at the beginning of my new “walk-trot” action, and the first pose of the trot cycle at the end of this new action. The difference was only in the position of the front feet–they were flipped. So, I added in the same poses for the back feet as a traditional “walk”, but for the front feet I knew I would have to accomplish an odd number of steps in the same time span. I used 60 frames as my standard for each of the three actions, so while each step happened in 15 frames in “walk” and “trot”, and could happen still for the back legs of “walk-trot”, the front legs had to take a step every 10 frames instead. The trick, of course, is that I wanted the transition to have the same constant speed as the previous two actions (2BU per step). This meant if the cat was covering 2BU in 30 frames on the back legs, the front legs would have to cover 1.333 (repeating) BU in 20 frames in order to keep up. And that’s precisely what I did. Then I put them together in a sequence (click to enlarge):
Unfortunately, the “follow path” action property seems to only allow one action, and does not allow switching between different actions. So, instead, I had to perform the distance translation for the cat’s armature (with everything parented to follow along, of course) manually. However, since the rate of the three actions was constant, it was an easy equation–4BU per 60, or 12 BU for the whole movie. The result is what you see, above. Unfortunately, the uniform ground plane doesn’t show off the footfalls, which due to the simple calculations above do not slip around. However, the camera angle also doesn’t show the well-modeled back legs, either. Mostly, what you see is that I have plenty more to do, including vertex painting for the face, modeling and installing eyes, nose, and mouth, continuing to refine the fur (possibly using the fiber generator to supplement what static particles can do), and adding lots of other actions I can composite together in the NLA editor (like “twitch tail”, “wiggle ears”, and “sniff around”) to assemble very complex behaviors just like a real cat. I’m looking forward to learning much more as I continue to improve this model, and hope to ultimately use it in a short movie.

